


Stamped Concrete is a cost-effective and high-quality alternative to more costly genuine materials. You get all of the strength, durability, and maintainability of concrete along with the pattern, texture, and look of other materials when you combine it with other types of concrete.
The usage of stamped concrete in outdoor settings such as patios, walkways, driveways, and pool decks is becoming more popular. Concrete work OKC has recently impacted the interior flooring market as well, particularly in the wood-look flooring category.
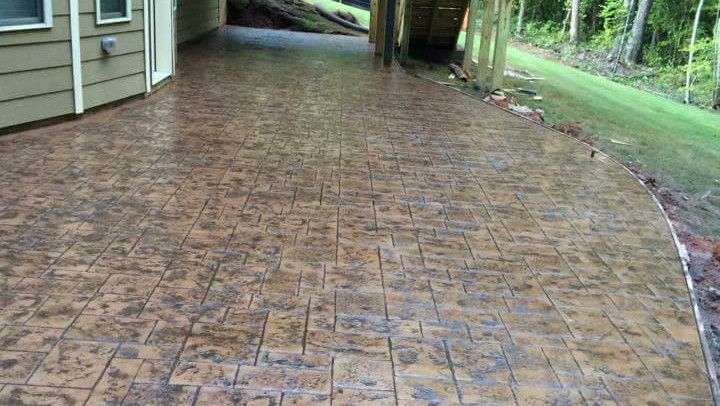
Stamped concrete is created by combining three elements- the base colour, the accent colour, and the stamping. When combined, this produces colour and form that is almost indistinguishable from the original material. Here are the few ways that can help you to stamp the concrete –
- Begin by adding the base colour
While the concrete is still wet, you’ll need to apply the base colour to give it a uniform appearance.
Typically, this is the primary hue of the flooring that reflects the natural flooring material, such as a brick tone or a blue slate tone, for example. The following are some of the most common stamped concrete colours –
· Venetian Pink
· Reddish-orange
· Platinum Gray
· Walnut
· Arizona Tan
· Slate Gray
· Brown with a hint of red
· Ash White
Add the accent colour to the formula
Stamped concrete has a textured appearance because of an accent colour, which is a complementary hue to the primary colour and helps create texture. Besides acting as a non-adhesive, the accent colour-releasing chemical also prevents the concrete stamps (the pattern moulds) from adhering to the concrete.
The use of varied colour accents is something you can consider. Through the use of different hues within the flooring, a natural and genuine appearance is achieved. Custom blended colours can be used in Concrete work OKC to create a stunning effect that mimics marbling or natural slate.
- Evaluate the construction
Before stamping, you should check to see if the concrete has reached the proper level of plasticity. If you begin stamping too soon, the concrete will not support the weight of both the stamp and the workers, resulting in an impression that is much too deep.
- Pretexture the perimeter
To prepare the surface before stamping the concrete, you should texture it along the area’s perimeter to be textured. Then, using a texturing skin or a flex mat, work your way inside from the outside for the first 6 to 12 inches.
- Apply the stamp to the concrete
Polyurethane moulds are highly recommended since they are reusable, easy to maintain, and leave a firm imprint in the concrete when used. In addition, most stamp sets are labelled, allowing you to arrange them in the most natural way possible to produce a natural patterning.
It is important to minimize pattern repetition since it will make the stone seem tiled and artificial instead of genuine stone.
Wrapping it up!!
Walking over the mats once or twice will be enough to imprint the stamps on the rubber paper. Additionally, you can use a gauge rake, an adjustable instrument that aids in achieving a more consistent thickness level. When you gently press down on these moulds, the concrete will be imprinted with the pattern and texture that you want. When doing concrete work OKC, be sure to wear clean work shoes to prevent contaminating the stamped concrete with dirt.


